7 Simple Home Maintenance Tips for Beginners
Let me tell you a story. I was thrilled when I initially moved into my house. It was everything I had hoped for: my place, my walls to paint, and my lawn to enjoy. About three weeks later, the kitchen faucet started to leak. It’s hardly a giant deal, is it? I didn’t pay attention to it. The air filter then changed to a gray color I didn’t know existed. I also overlooked that. A few months later, I had a small plumbing problem that turned into a big plumbing expenditure, and my HVAC system was working twice as effectively as it needed to.
What I learned through experience is that home maintenance is essential. It’s not pretty. It’s not the best aspect of owning a property. But it’s the part that keeps your home safe, saves you money, and stops those awful catastrophes that always seem to strike on holiday weekends.
This guide is for you if you’re new to homeownership, whether you just bought your first home, moved into a new rental, or never learned these things as a child. No judgment. No hard-to-understand words. Seven easy, useful suggestions for keeping your home in good shape that anyone can start doing right away.
Let’s get started. 7 Simple Home Maintenance Tips for Beginners
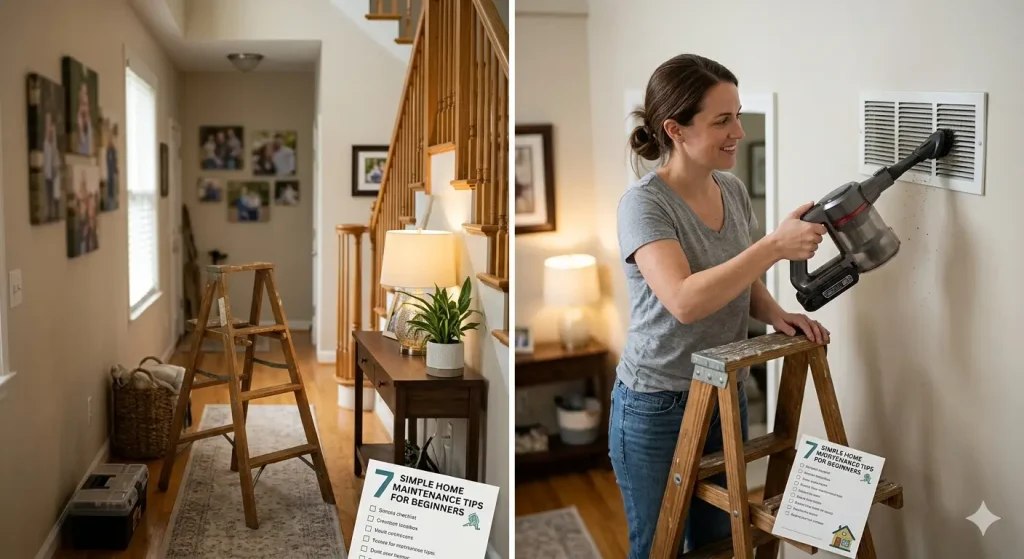
1. Change Your HVAC Filters Regularly (Yes, This Actually Matters)
I get it, I get it. The subject sounds dull. You might have heard it before and thought, “How important can a small filter be?” Believe me, I thought the same thing. After that, I looked at my electricity bill.
Your heating, ventilation, and air conditioning (HVAC) system features filters that catch dust, pet dander, pollen, and other small particles that are in the air in your home. Over time, those filters become clogged. When they do, your system needs to work a lot harder to move air, which costs you more money and wears out the equipment faster.
This is the easy rule: Depending on the type of filter and where you live, you should check them every 30 days and change them every 1 to 3 months. If you have pets, allergies, or live in a dusty location, you should lean toward the more frequent end.
How to do it:
- Find your HVAC unit. It is commonly in a garage, attic, basement, or closet.
- Find the filter slot. It’s usually close to the return air duct or on the unit itself.
- Take the old filter out. Pay attention to the size printed on the frame, which should be something like 16x25x1.
- Put the new filter in, making sure the arrow for airflow points toward the unit.
- That’s all. For real. It takes roughly two minutes.
You may get filters at any hardware store or order them online. Some folks even sign up for a membership so that they come to their door every time. Do what works for you, but don’t forget to do it.
Why novices adore this tip: It’s simple and inexpensive, and it nearly instantly improves the quality of your air and lowers your energy expenditures. It’s one of those little victories that boosts your confidence and makes you think, “Hey, I really do know what I’m doing.”
2. Test Your Smoke and Carbon Monoxide Detectors
This one isn’t about protecting your property or saving money. It’s about keeping you and your family safe. I don’t make this statement for dramatic effect; I make it because it is true.
Carbon monoxide detectors and smoke detectors are the first things you should use to protect yourself from two of the most deadly things that can happen in your home. Smoke detectors let you know when there is a fire. Carbon monoxide detectors let you know about a gas that is colorless and odorless that can kill you.
However, the National Fire Protection Association says that roughly three out of five people who die in house fires do so in homes that don’t have smoke alarms or have broken smoke alarms. Every time I read that number, it crushes my heart since it’s one of the easiest things you can do as a homeowner.
This is what you need to do:
- Check each detector once a month. Most detectors feature a button that you can press. You’re useful if you make a loud noise.
- Please replace the batteries promptly if they are not functioning.
- At least once a year, change the batteries.
- You can do that when you change your clocks for daylight saving time, which is a terrific trick. That way, you’ll always remember.
- Replace the entire device every ten years, or sooner if recommended by the manufacturer. Even detectors that are hardwired don’t last forever.
- Make sure your detectors are in the appropriate spots. You should have one on every floor of your house, in every bedroom, and outside where people sleep.
I have a simple reminder on my phone calendar that goes off on the first of every month. It says, “Test smoke detectors.” It takes around five minutes to walk through the house and press all the buttons. Five minutes for peace of mind? I’ll accept that bargain every time.
A little note for people who rent: You are still responsible for your personal safety, even if your landlord is supposed to provide detectors. Try them out. Change the batteries if they die. If a detector is not functioning properly, please inform someone immediately. Don’t wait.
3. Clean Your Gutters (Or at Least Know Why You Should)
Cleaning gutters on a Saturday isn’t my idea of a good time. But if you don’t do it, it could cause some very costly complications.
The only reason gutters are there is to keep rainwater from getting to the foundation of your home. Water can pool around your foundation when they fill with leaves, twigs, mud, and other debris. These conditions can lead to cracks in the foundation, floods in the basement, water damage to your walls, and even mold growth over time.
None of those problems are cheap or quick to fix.
How often do you need to clean them?
At least twice a year, once in the spring and once in the fall. You might need to do it more often if there are many trees near your house.
How to do it in a safe way:
- Get a strong ladder. Make sure it’s on level ground, and don’t lean it against the gutters.
- Put on gloves. You will be picking up damp, rotting leaves, and believe me, you want that barrier.
- Use your hands or a tiny garden shovel to scoop out the trash.
- Use a garden hose to flush the gutters and downspouts to make sure the water flows smoothly.
- While you’re up there, check for damage by looking for loose brackets, holes, or parts that are coming away from the house.
Hire a pro if you don’t feel safe on a ladder. There’s no shame in that. Depending on how big your house is, gutter cleaning services usually cost between $100 and $250. That’s only a small part of what it would cost to fix the foundation.
If you’re just starting out, you might want to think about putting up gutter guards. They won’t completely get rid of the need to clean, but they do keep a lot of junk out, which means you won’t have to spend as much time on a ladder.
I have to say, I was astonished by how much junk was in my gutters the first time I cleaned them. It seemed like a tiny biosphere had formed. After a few handfuls of wet leaves, the water was flowing freely again, and I felt like I had just stopped a tiny calamity. To be honest? I probably did.
4. Inspect and Seal Gaps Around Windows and Doors
Sealing gaps and cracks around your windows and doors is a home maintenance tip that will practically pay for itself.
The caulking and weatherstripping around your doors and windows might wear out over time. When this happens, you have drafts: warm air leaks out in the winter, and cool air leaks out in the summer. Your energy bills rise because your HVAC system has to work harder.
But here’s something most people don’t know: those spaces also let in dust, moisture, and bugs. Sealing them up isn’t just for comfort; it’s also to keep your home safe from water damage and pests.
How to look for gaps:
- The test of sight: Check the margins of your windows and doors. Do you see caulk that is cracked, flaking, or missing? Can you see light through a closed door?
- The hand test: On a windy day, put your hand toward the edges of doors and windows. Do you feel a draft?
- The incense test: Light an incense stick and hold it close to the edges. You have detected a leak if the smoke spreads sideways.
How to make it work:
- For gaps around the frames of windows and doors: Use caulk on the outside. A tube of caulk costs a few dollars, and a caulking gun costs between $5 and $10. Put a smooth bead along the gap, and then use your finger or a caulk finishing tool to smooth it out.
- For spaces under doors: Put in a draft stopper or door sweep. These are cheap and normally only screwed or glued into place.
For spaces around windows that open and close: Change the weatherstripping. You can buy weatherstripping that sticks to itself at any hardware shop.
I recall the first winter I spent in my house. No matter how high I turned up the heat, the living room was always frigid. Upon inspecting the windows, I discovered gaps large enough to fit my finger through. After spending $10 on a tube of caulk and an hour of my time, the room was much warmer. My next energy statement showed that I saved roughly 15% compared to the month before.
Why this step is important for beginners: This activity is one of the least expensive things you can do to keep your home in good shape. The supplies don’t cost much, the technique is easy, and the results are quick. You don’t need any particular talents, just a caulking gun, some time, and the ability to get a little dirty.
5. Know Where Your Water Shut-Off Valve Is (Before You Need It)
This suggestion isn’t about keeping things in good shape; it’s about being ready for an emergency. And it’s something that every homeowner and renter should know, but many people don’t.
Picture the scenario: It’s Sunday night at 11 PM when a pipe in your basement breaks. There is water everywhere. You’re freaking out. You pick up your phone to call a plumber, but as you wait, gallons of water are pouring into your home every minute.
Now picture the scene: a pipe breaks, and in less than 30 seconds, you’ve shut off the main water supply to your home. The water stops. You take a deep breath. You call the plumber in a calm way. The damage isn’t that bad.
What makes those two situations different? Knowing where your shut-off valve is.
How to discover it:
- The main water shut-off valve in most homes is where the water comes into the house. The basement, crawl space, garage, or near the water heater are all common places.
- It could be outside in warmer places, close to the foundation, or on the street (typically in a covered box at the curb).
- It could be under the kitchen sink, in a utility closet, or in a common mechanical room in an apartment.
What you should do now:
- Look for it. Take a walk around your house and find the main shut-off valve. If you’re unable to locate it, please refer to your home inspection report (if available) or consult your landlord.
- Try it out. To close it, turn it to the right (righty-tighty). If you turn on a faucet and no water comes out, you’ve identified the appropriate valve.
- Check to see whether it works well. Don’t push it if it’s stiff or jammed. You could require a plumber to put in a new one. It’s better to find out now than when something disastrous happens.
- Put a label on it. Really. Put a bright tag or label on it so that everyone in your house can easily find it.
If possible, please locate the shut-off valves for each fixture as well. There are normally little valves under sinks and behind toilets. If you know how to turn off the water to a specific fixture, you won’t have to turn off the water to the whole house for a small problem.
A personal note: I once helped a friend fix a broken pipe in their guest bathroom. They didn’t know where the shut-off valve was. We located it beneath a stack of storage boxes in the basement, of course. At that point, water had severely damaged the ceiling below. That one thing made me go home and put bright red tags on every valve in my house.
This tip doesn’t cost anything. It could take 15 minutes. And it could save you a lot of money on water damage. Do it now.
6. Keep an Eye on Your Water Heater
You never think about your water heater until you’re in the shower and it’s freezing cold, wondering what happened to your morning routine.
Most old-fashioned tank water heaters last between 8 and 12 years. But if you don’t take care of them, they can break down sooner, work less well, and even become dangerous.
Beginning water heater maintenance:
Make sure the temperature is set correctly. The Department of Energy says that your water heater should be set to 120°F (49°C). Many water heaters are set to 140°F when they leave the factory, which wastes energy and makes it more likely that someone may get burned. You can save up to 10% on your water heating bills by turning it down to 120°F.
Keep an eye out for signals of disaster. Check your water heater every few months. Look for:
- Rust or corrosion on the tank or its connections
- Water collecting around the base
- Weird sounds like popping, rumbling, or pounding
- Your faucets are giving you hot water that is rusty or discolored.
- Any of these indicators could mean that you need to call a professional to fix something.
Once a year, check the pressure relief valve. This valve is a safety feature that lets pressure out of the tank if it becomes too high. To see if it works, lift the valve lever for a second. When you release the lever, the water should stop flowing. If it doesn’t work right, call a pro to fix it.
Once a year, flush the tank to get rid of any silt that has built up. Sediment, made of minerals and debris from your water supply, builds up in the tank over time. It makes things less efficient and can hurt them. To flush it, connect a garden hose to the tank’s drain valve at the bottom, turn off the heater, and let the water flow into a bucket or floor drain until it is clear.
I won’t lie: I was scared the first time I flushed my water heater. It looked like a big, challenging job. But it took approximately 20 minutes, and the amount of sediment that came out was really surprising. The water was dirty and cloudy. Thereafter, my water heater seemed to heat water faster and was quieter. I thought to myself, “Why didn’t I do these repairs sooner?”
If your water heater is more than 10 years old, producing unusual noises, leaking, or not heating water well, it’s time to hire a professional to check it out or replace it. Don’t wait until it stops working totally. A planned replacement is always better (and cheaper) than an emergency one.
7. Create a Home Maintenance Schedule (And Actually Stick to It)
Understanding the necessary tasks for home upkeep is only half the challenge. The other half is making sure you constantly do it.
I can give you all the advice in the world, but if you can’t remember it, it will be lost. I know what I’m talking about. I kept everything in my thoughts for the first year I lived in my house. I told myself to remember to inspect the gutters in the fall, test the smoke alarms every month, and clean the filters every three months. And you know what? I forgot most of it.
That’s when I made a simple timetable for taking care of my home, and it changed everything.
How to make your schedule:
You don’t need anything special. You can use a spreadsheet, a notebook, calendar software on your phone, or simply a piece of paper taped to your fridge. Organizing tasks based on their frequency of completion is crucial.
Tasks to do every month:
- Inspect the smoke and carbon monoxide detectors.
- Examine the filters in your HVAC system and replace them if they require it.
- Look under sinks for leaks.
- To keep drain traps from drying out, run water in fixtures that aren’t being utilized.
- Filter for the kitchen exhaust fan
Every three months, you have to do these things:
- Change the filters in the HVAC system.
- Examine the safety feature that makes the garage door go back automatically.
- Look at the caulking around the sinks, showers, and tubs.
- Verify the fire extinguishers.
- Clean the area around the lint trap and dryer vent.
Every six months, you need to do these things:
- Clean the gutters in the spring and fall.
- Check the roof for shingles that are broken or missing.
- Look at the weatherstripping and caulk around windows and doors.
- Inspect the pressure relief valve on the water heater.
- Deep clean the dishwasher, oven, and refrigerator coils.
Things to do every year:
- Flush the water heater.
- Service the HVAC system (think about getting a professional tune-up).
- Examine the foundation for cracks.
- Look for leaks, vermin, or problems with the insulation in the attic.
- Check and reset all of the GFCI outlets.
- Verify and update your house inventory for insurance reasons.
Here are some tips for keeping to your schedule:
- Make reminders on your calendar. In this situation, your phone becomes your most reliable companion. Set reminders for each task to go off again and again.
- Do your tasks in groups. Choose one day a month on the weekend to do “home maintenance.” Do all of the assignments that are due this month and those that are due this season.
- Write down when you do maintenance. Make a note of what you did and when. This procedure is really useful for keeping note of patterns (such as how quickly your filters become dirty) and for keeping records in case you ever sell your property.
Don’t try to be flawless. Some months, you might miss a task. That’s OK. It’s not about being perfect; it’s about being consistent over time. - Be pleased with your successes. Knowing that you just finished your quarterly maintenance check makes you feel positive about yourself. You’re looking after your home. That’s a major thing.
I use a basic Google Sheet to keep track of my schedule. I color code it: green for things I’ve done, yellow for things I need to do, and red for things that are overdue. It takes me about five minutes a month to update, and it helps me see where I am. When friends ask me how I keep up with home repairs, I show them the spreadsheet. They are all surprised at how easy it is.
Final Thoughts: You Don't Have to Be a Home Expert
If you’ve read this far, I want you to know something important: you don’t have to know everything about taking care of your home to be a successful homeowner.
You don’t have to be a contractor, plumber, or electrician. You don’t need to have a lot of experience or expensive instruments. You just need to care enough to pay attention, learn the essentials, and do something before tiny problems turn into giant ones.
There was a time when every expert was a beginner. By reading this article, looking for ideas, and attempting to learn, you are already ahead of many individuals who neglect their homes until something breaks.
Pick one tip from this list to start with. Only one. You might want to test your smoke alarms today. You check your HVAC filter tomorrow. You find your water shut-off valve next weekend. Start from there. Soon, these chores will feel like second nature, and you’ll wonder why you were ever scared of taking care of your home.
Every day, your home protects you from storms, keeps you warm in the winter, and gives you a place to sleep at night. In return, we should at least take care of it.
Welcome to the club, and we wish you success in maintaining your home. We’re pleased to see you.
Do you have a suggestion for keeping your home that saved you time, money, or a headache? Please leave a comment below to let us know what you think!