7 Stunning Flower Bed Design Ideas
It is truly pleasant to step outside your front door and observe a flower bed that functions perfectly. You know the sort I’m talking about—the ones that stop you in your tracks, coffee in hand, and make you take it all in. The colors work well together. The textures blend harmoniously in all the right places. Everything appears planned out, but not too much. Not ignored, but natural.
You aren’t alone in wondering, “Why doesn’t my yard look like that?” after seeing garden photos online. A lot of us have been there. On a lovely Saturday, we go to the garden center and buy many flowers. Next, we excavate some holes, insert the flowers into them, and hope for the best outcome. It works out occasionally. A lot of the time, it turns out to be… well, let’s just say “underwhelming.”
But here’s the deal. You don’t need to spend a lot of money or know a lot about plants to make a beautiful flower garden. It’s all about the design. It’s about thinking about a few important things before you start digging. And to be honest? Once you get the hang of the basics, it’s one of the most fun creative tasks you’ll ever do.
So let’s speak about seven ideas for designing flower beds that can really change the look of your yard, no matter how big or small it is. It might be a big backyard, a small front yard, or even just a short strip of dirt beside your driveway. These aren’t one-size-fits-all tips. They are genuine, useful, and attractive ways to do things that work in the real world, not only in magazines.
Let’s get started. There is no doubt that the phrase is a pun.
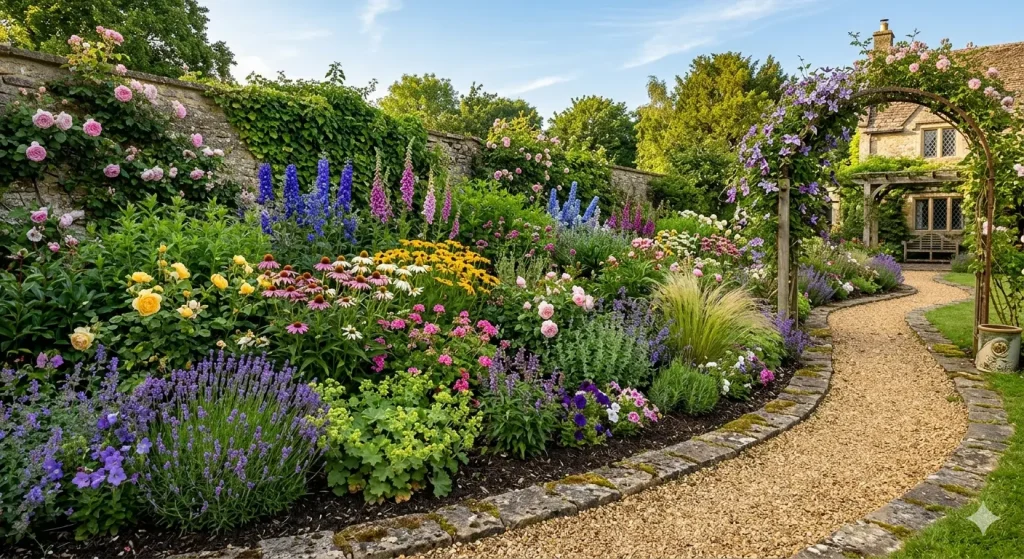
1. The Layered Cottage Garden Bed
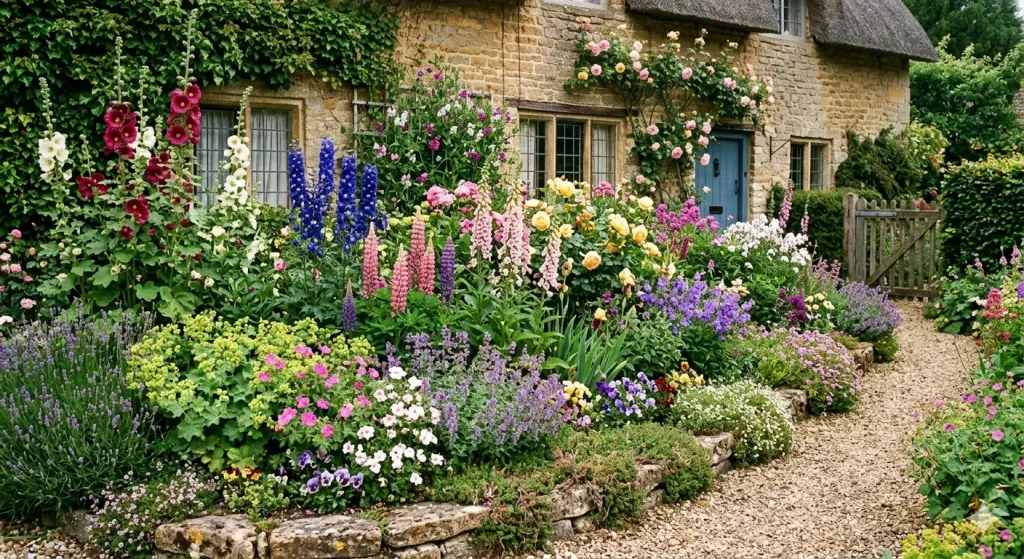
The cottage garden flower bed is perfect for you if you like the romantic, slightly wild aspect of the “English countryside.” This style of design is all about having a lot of things, being charming, and that great sensation that nature just decided to come up and show off.
Layering is the secret to making a cottage garden bed work. You should think about levels of height. If you can see the bed from all sides, put tall plants in the rear or the middle. In the middle, there are plants of medium height. And plants that grow low or hang down the front margins.
Ideas for tall layers: climbing roses on a tiny trellis, hollyhocks, delphiniums, or foxgloves.
For the middle layer, you might use lavender, salvia, coneflowers (echinacea), or Shasta daisies.
Ideas for the front layer: creeping thyme, sweet alyssum, dianthus, or geraniums that don’t grow too tall.
Cottage gardens are so appealing because they aren’t flawless. You don’t want rows that are perfectly straight. You want the plants to touch each other and make a colorful and textured tapestry. Add some self-seeding annuals like cosmos or bachelor’s buttons. Over the seasons, the bed will change and surprise you.
One useful tip: if you’re not careful, cottage gardens can look dirty. The trick is to create a clear boundary, such as a crisp edge of brick, stone, or even a clean-cut lawn line, that keeps the wildness inside. The whole building looks planned instead of abandoned because of the difference between the neat boundary and the lush inside.
The first time I attempted a cottage-style bed next to my garage, I remember. To be honest, it looked like a big mess for the first several weeks. My neighbor even asked me whether I was “still working on that area.” But by the middle of summer, when the foxgloves were tall, the lavender was swarming with bees, and the alyssum was spilling over the stone edge? That same neighbor asked me which plants I thought would be good for them. You have to be patient with the cottage garden, but the results are amazing.
2. The Monochromatic Flower Bed
You might be surprised by this one. Most people think of flower beds as having a lot of color. But some of the most beautiful flower beds you’ve ever seen just employ one color family.
A monochromatic bed is one that has only one color, such as white, purple, pink, yellow, or even deep red. The whole design is based on different shades of that color. The end product is quite elegant and soothing. It creates a sense that everyone is united in this space, something a bed with many colors cannot always achieve.
A beautiful example is a white garden. Think of white peonies, white roses, white hydrangeas, silver-leaved dusty miller, and white-flowering ground covers. A white garden seems like it’s glowing in the twilight light. The famous White Garden at Sissinghurst Castle in England has inspired gardeners for decades for a good reason.
Another excellent choice is a purple and blue bed. You can use Russian sage with catmint, lavender, salvia, and allium globes. For a different texture, add some blue fescue decorative grass.
To keep a monochromatic bed from looking flat or dull, you need to change the forms and textures. You need plants with spikes next to plants with spherical leaves. Leaves that are shiny adjacent to dull leaves. There are big, bold flowers next to soft, airy ones. The color stays the same, but everything else makes it captivating to look at.
This method works wonderfully in small places, too. A little front yard bed with only whites and greens looks far nicer than one with every hue of the rainbow. Sometimes, the most beautiful thing is to hold back.
3. The Raised Flower Bed with Structure
Not only vegetable gardens can use raised beds. Some of the most beautiful flower displays I’ve seen are in well-planned raised beds. And in terms of practicality, raised beds fix a number of common gardening concerns.
Do you have bad soil? A bed that is higher. Is the drainage bad? Bed that is raised. Do you have back discomfort when you bend over? Bed that is raised. Deer consuming everything on the ground? A taller raised bed can also help with that.
Raised beds not only have practical benefits, but they also offer structure to your landscape. They make clean, clear forms that frame your flowers. The flowers are the painting, and the raised bed is the frame.
The choice of material is important. Natural stone provides your home a classic, rustic appeal. Planks made of cedar or redwood give off a warm, sophisticated vibe. Corten steel, which looks like it has rust on it, is in style right now. It goes well with soft, flowing plants and gives off an industrial-chic vibe. When you put the proper plants with stacked concrete blocks, they can look quite elegant.
Raised beds let you control the soil quality, so you can grow flowers that may not thrive in your native soil. If your soil is excessively alkaline, now is your chance to plant those picky perennials that demand perfect drainage or those lovely azaleas that love acid.
When it comes to design, think about making several raised beds at varying heights. Two or three beds of different heights—tall, medium, and low—create a layered, dynamic look. Use color schemes that go well together, and use the same few plants in all the beds to make the look more cohesive.
From my experience, I can tell you that you shouldn’t create your raised beds too wide. It will be challenging to maintain if you can’t simply reach the center from either side. A width of three to four feet is ideal for most people.
4. The Pollinator Paradise Bed
This design idea is vital to me because it affects both form and function. The goal of a pollinator garden is to draw in and help bees, butterflies, hummingbirds, and other important animals that keep our ecosystems running.
And here’s the great news: plants that are good for pollinators are often some of the most beautiful ones you can find. So you don’t have to give up beauty for the environment. You’re getting both.
Important plants for a bed for pollinators:
- Butterfly bush (buddleia), milkweed (which is critical for monarchs), zinnias, lantana, and asters are all beneficial for butterflies.
- Bees are attracted to plants such as lavender, bee balm, sunflowers, borage, and clover.
- For hummingbirds: columbine, fuchsia, salvia, trumpet vine, and cardinal flower.
The idea behind this design is to plant in groups. Groups of the same flower are more likely to attract pollinators than solitary plants that are spread out. Try to identify groups of at least three to five of the same type. This arrangement also enhances the visual appeal of the picture, resulting in a mutually beneficial outcome.
Another thing to think about is the order in which the flowers bloom. You want flowers in your bed from early spring until late fall. This means picking a combination of early bloomers (like crocuses and hellebores), mid-season stars (like coneflowers and black-eyed Susans), and late-season performers (like asters, goldenrod, and sedums). In this manner, your bed will always have something blooming, and pollinators will always have food.
Put some flat stones in sunny locations because butterflies like to soak up the sun on warm surfaces. Put a shallow dish of water with rocks in it so that bees may drink without getting wet. These little things make a flowerbed into a real home.
Two years ago, I put in a pollinator bed along my back fence, and the change has been wonderful. Not simply how it appears (which is beautiful, by the way), but also the life it draws in. There are scores of bees buzzing around the bee balm, butterflies flying among the zinnias, and hummingbirds flying around the salvias every summer morning. Nothing else in my yard feels alive like these plants.
5. The Modern Minimalist Bed
Not everyone wants a garden that is full of plants and flowers. Your flower beds should match the style of your home, whether it’s modern architecture, clean lines, or a minimalist look. A well-executed minimalist flower garden can be so simple that it leaves you in awe.
The idea behind this approach is to use fewer types of plants, position them more carefully, and use strong geometric shapes.
A modern minimalist bed may consist of only two or three types of plants arranged in a specific manner. For example, a row of decorative grasses, such as Karl Foerster feather reed grass, can be placed behind a cluster of black-eyed Susans, with a clean layer of gravel or stone mulch covering the soil. That’s all. Three parts. But the effect is strong.
These are some great plants for minimalist beds:
- Blue oat grass, fountain grass, and maiden grass are all types of ornamental grasses.
- The lily of the Nile, or Agapanthus, has those beautiful blue blossoms that seem like globes.
- Evergreen structures can be made using boxwood spheres or low hedges.
- Alliums, those big purple balls on tall stems, are perfect for modern gardens.
- Sedums and succulents do well in warm weather.
Hardscaping is a key part of minimalist beds. You can use big, smooth river boulders or angular slate pieces to decorate the bed itself. Decorative gravel or pea stone mulch (in white, black, or natural tones) creates a clean, polished look that’s considerably different from regular bark mulch.
The edges should be clear and sharp. Steel or aluminum landscaping edging makes obvious lines between the bed and the lawn or sidewalk. The whole design looks modern because of that sleek edge.
One piece of advice: you might assume that minimalist beds need more care than they do. Because there are fewer plants and more visible soil or mulch, you may see any weeds that grow right away. Keep up with the weeds, and think about putting landscape fabric under your gravel mulch to keep things clean.
6. The Four-Season Interest Bed
Planning exclusively for summer is one of the most common mistakes people make when designing flower beds. Your bed could look fantastic in July, but what about in November? How about February? Every season, a well-designed flower garden has something intriguing to look at.
It takes a little more planning, but eventually, you’ll have a bed that looks appealing in your yard all year long.
In the spring, plant bulbs like tulips, daffodils, crocuses, and hyacinths. Underneath them, plant early-blooming perennials such as bleeding hearts, hellebores, or Virginia bluebells.
This period is your busiest time of year in the summer. Add classic flowers like roses, daylilies, hydrangeas, coneflowers, phlox, and dahlias to the mix.
In the fall, plan for chrysanthemums, asters, sedums (their flower heads change stunning shades of rust and burgundy), ornamental grasses (which look their best in the fall with feathery plumes), and late-blooming anemones.
Winter: This season is when most beds don’t do well, but they don’t have to. Evergreen shrubs like dwarf boxwoods, holly, or small conifers add green structure. Ornamental grasses that stay up all winter offer movement and look wonderful when they frost. Plants with fascinating bark or seed heads, such as the skeletons of hydrangeas and the papery pods of baptisia, add a small amount of beauty to the winter landscape. And plants that bloom in the winter, like witch hazel or winter jasmine, may provide color to the darkest months.
Structure is the most important part of a four-season bed. When the deciduous perennials die back, you need a backbone of evergreen or semi-evergreen plants to hold the bed together visually. Your bed will look like a patch of bare dirt for five months of the year if you don’t have that structure.
I learned this lesson the hard way. My first perennial bed was a summer stunner; in July, it was magazine-worthy. But by December, it was a sad, flat, empty rectangle of mulch with a few dead shoots sticking up. Now, I always start with the winter perspective when I design a bed. If it looks appealing in January, it will look wonderful in June.
7. The Curved Island Bed
A curved island bed can be just what your yard needs if it has a huge, open lawn area that seems a little monotonous or empty. Island beds are different from border beds because they are open and surrounded by grass or hardscape on all sides. Border beds are next to fences, walls, or walkways. They attract attention to the center of your yard, significantly altering its appearance.
There shouldn’t be any straight lines or sharp edges in the design of island beds. Curves that are soft and flowing look natural and inviting. If you want to look modern, you might want to put rigid rectangles or squares in the middle of your lawn. Otherwise, they look uncomfortable and out of place.
Use a garden hose to make a curved island bed. Simply place it on the ground and adjust its position until it achieves the desired appearance. Take a step back and gaze at it from different angles, like from the windows of your house. Once you’re comfortable with the shape, use spray paint or flour to mark it, and then start digging.
In an island bed, you must consider plant placement differently than in a border bed, as it is visible from all sides. Put the tallest plants in the middle, and as you get nearer the edges, the heights should go down. This arrangement makes a magnificent mound that looks great from every aspect.
Center plants can be tall ornamental grasses, big perennials like Joe Pye weed, or even a tiny ornamental tree like a Japanese maple or crepe myrtle.
Middle ring: Perennials that are medium height, such as black-eyed Susans, coneflowers, Russian sage, or daylilies.
Low-growing plants like creeping phlox, coral bells (heuchera), low sedums, or sweet alyssum are in the outer ring.
Island beds also look better with a thick layer of mulch and a neat, well-kept edge. You can see any rough edges or bare spots right away because they’re in the heart of your grass.
A kidney-shaped bed I made in the middle of a client’s backyard is one of my favorite island beds ever. We put a magnificent dwarf Japanese maple in the middle, encircled it with purple salvia and yellow coreopsis, and put silver-leaved lamb’s ear around the whole thing. It was simple—maybe 10 different kinds of plants—but it turned a dull rectangle of grass into a place that felt like a destination. The family began having meals outside so they could be close to it. That’s what a well-placed island bed can do.
Bringing It All Together: Tips That Apply to Every Design
No matter which of these seven options you like best, there are some basic rules that will help your flower bed do well:
First, get your soil ready. I realize the preparation isn’t the fun part, but it’s the most crucial part. Before planting, add compost to your soil. Your flowers will thank you with stronger growth and more blooms.
Ensure that the appropriate plant is placed in the right spot. Monitor the levels of sunlight and moisture. Regardless of the design’s beauty, a plant that prefers shade will struggle in full light. Look at the tags on the plants. Even better, watch your yard all day and write down where the sun touches and how long it stays there.
Plant in groups of three. Three, five, or seven groups look more natural and are easier on the eyes than even numbers. This technique is one of those design tricks that seems ridiculous but really works.
Repeat important plants. Repetition gives things a rhythm and makes them fit together. If you utilize a certain plant in one part of the bed, use it again in another portion. It saves the whole design from looking like a haphazard selection and connects it all together.
Be tough when you edit. At the garden center, it’s easy to want to buy one of everything. Don’t give in. A bed with five well-chosen species will almost always look better than a bed with twenty random ones. Simple things are strong.
Put down mulch, mulch, and more mulch. Two to three inches of organic mulch keeps weeds from growing, keeps moisture in, and makes the bed look finished and polished. This technique is the easiest thing you can do to make any flower bed seem ten times better right away.
Final Thoughts
One of the few undertakings that combines art and nature in the best way is making a flower bed. You can be creative, work with your hands, and see something grow and change over time. It’s truly unique.
Don’t let the procedure scare you. You don’t have to be a pro at designing landscapes. You don’t need a lot of money. You only need to prepare a bit, be open to trying new things, and know that gardens are never really “finished.” They are living, changing things, and that’s what makes them so great.
Pick one of these seven ideas to get started. Choose the one that fits your taste, your space, and the weather in your area. Draw it out on a piece of paper. Go to your local nursery and talk to the folks who work there. They are usually gardeners themselves and they like helping customers choose plants.
Then get your hands filthy. Put in a plant. Give it water. Monitor its growth closely.
And next summer, when you step in your yard with your morning coffee and see a flower bed that makes you smile, you’ll know exactly why it was worth every minute.
Enjoy your gardening.
Which flower bed style are you most looking forward to trying? I’d love to hear about your plans, questions, or triumphs in the garden.